Showing posts with label DIY. Show all posts

Tuesday, February 26, 2013

Decorating Inspiration

One of the challenges of renting an apartment is decorating. Since getting a part-time job at a Michael's Craft store, I have had to fight strong urges to buy everything. It's all so cute! And I get a discount! But back to complaining about renting... I'm afraid to do anything to the walls. We tried putting some 3M hooks up in the closet for our coats, and they fell off after a week. Not good.

So I've been trying to think of ways to decorate without heavy things. We don't have a headboard, and the blank wall above the bed is bothering the heck out of me! So I decided to mix the popular bunting idea with my Michael's supplies. Here's the inspiration:

The template (and top photograph) comes from Antibromide. I plan to make my bunting much larger, to fit the scale of my bedroom. I would have never thought of adding tabs to the top to fold over and attach to the twine! Before I found this tutorial, I was planning to punch small holes in the top corners, and thread the twine through. Now I have options to play with...

The bottom photograph comes from Design Seed. I saw a few color palettes on Pinterest, and thought it would be a great place to find a color scheme for my bunting. At first I wanted something with walnut brown and light teal, to match my duvet cover and sheets. The schemes just didn't feel right, and when I saw this relaxing palette, I knew I had a winner!

Below are a few more inspiration photos for the bunting. To see more (and more palettes), check out my pinterest page.


Source, source via this site.

Thursday, July 26, 2012

Beaded Granny Squares Tutorial

In my last post, I talked about how I was getting back into beading. I was thinking of other things I could make with my beads, and how I could incorporate it into my knitting obsession. Well, I had the idea to make granny square out of beads! They're super cute! I'm not entirely sure what I want to do with them... Earrings? String them together to make a bracelet? Use bigger beads to make keychains? There are a ton of possibilities!


Materials needed:
- Beads in 3 colors: 20 of the main color, 8 of the second color, and 12 of the third
- Needle (the thinner the better!)
- Beading floss (available at any craft store)


Step 1: Thread your floss on your needle. I like to double up the floss. Make it nice and long.

Wednesday, July 25, 2012

DIY: Giant Bead

This week, I found a great tutorial to make a giant bead out of smaller beads. This craft is right up my ally! I was obsessed with seed beads when I was younger. Remember those animals you could make out of pony beads and string? Yea, I made those out of seed beads... I must have been unusually patient in elementary school! From there, I moved onto a bead loom, and created some cool bracelets and necklaces. After that I must have gotten distracted with knitting! Luckily, I kept all of my beads. Here's the inspiration (via Craft Gawker):
The tutorial can be found here. It is based off of another tutorial for rings.
For my first giant bead, I used these gorgeous matte beads that I had. I didn't have enough to make the giant bead as long as the pattern in the tutorial, so I shortened it.


Friday, July 20, 2012

Claws and Paws: Triangle Tips

I have seen triangle tips a few places, but this recent pin on Pinterest inspired me to give it a try:
I knew that you could use Scotch tape to outline the triangles, so I found some tape and settled down to paint. The results were... frustrating.

Monday, May 28, 2012

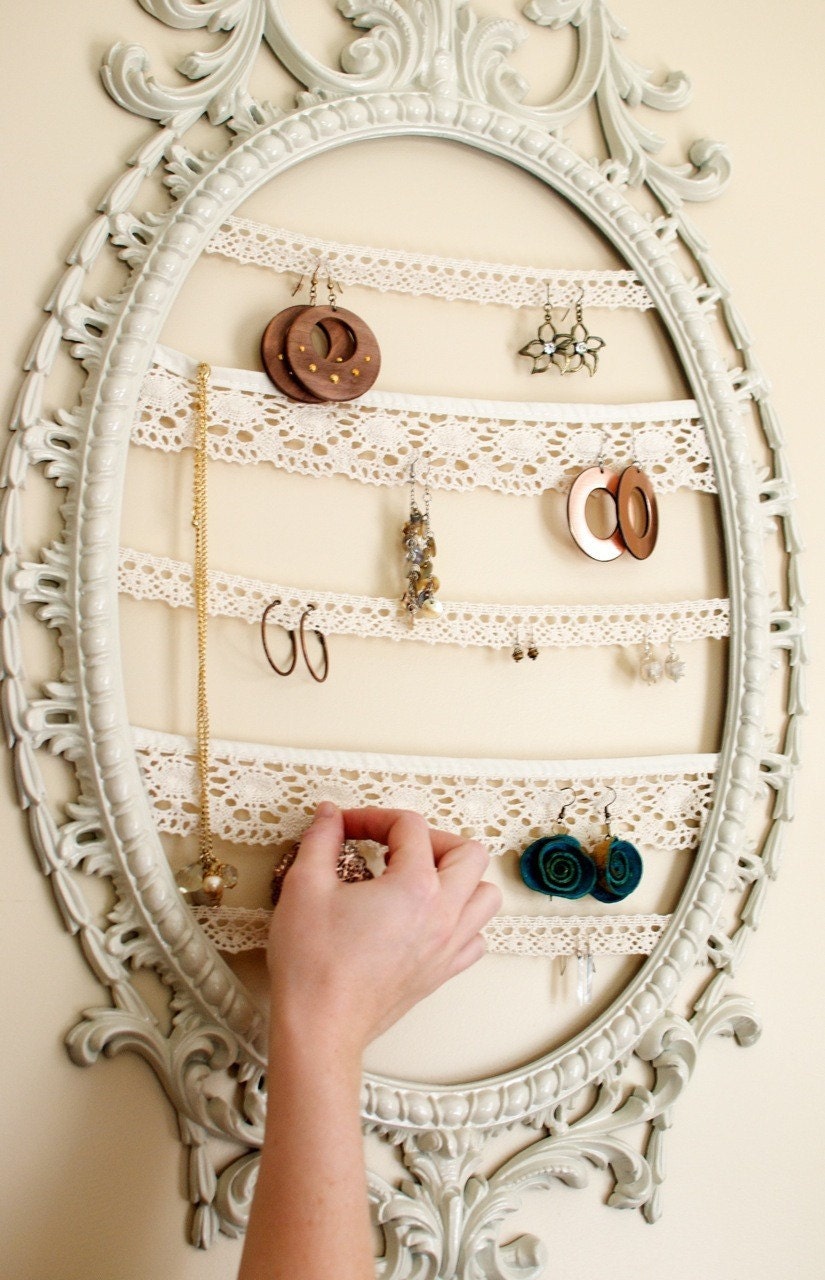
DIY: Lace Earring Holder

How I told you how much I love Pinterest? There are so many recipe and craft ideas I've seen! This weekend, I brought one to life. Here's the inspiration (left) and my creation (right):
[Source}

I wish I could have found a really ornate frame, like in the inspiration. I could have searched used furniture stores for old mirrors... but I was impatient and wanted to start the project! I found this wooden frame at Michael's. It wasn't in the frame section. Or the wooden "things to paint" section. It was in some random section on the side of the store. My sister also made one, and they both turned out great!  Here's what you'll need:
- Wooden frame
- Paint and paint brushes (I used acrylic paint)
- Tape (to tape off designs)
- Lace
- Glue gun
- 3M Command Hook or other way to hang frame

1. Decide how you want to paint your frame. If needed, use painters tape to tape off your design. Note: I highly recommend this! I decided not to use tape, and ended up with some blue splotches I had to cover with my yellow paint. Also, my art school sister recommends Scotch brand Magic tape. It looks like scotch tape, but is better (somehow). Apparently it was unbelievable that I hadn't known about this tape before yesterday.

2. Paint your frame! I opted to paint the front and edges of my frame, while my sister decided to paint only the front, and keep the sides natural.

Notice the use of tape, ensuring a splotch-free frame...


I did two coats of blue, and three coats of yellow. The good thing about acrylic is that by the time I finished the first coat, it was dry and I could start the second coat right away!

Once your paint is completely dry, break out your hot glue gun. Decide how you want to hang your lace, and mark the back of your frame accordingly. I applied hot glue to the frame, pressed the lace down, and rolled a pencil over it to make sure it was snug to the frame. After it all dried, I went back and did a second layer of glue on top (am I paranoid? Maybe. But I don't want the lace to fall off when it's holding my earrings!).


Have you made anything from Pinterest? Make anything this weekend?