
Materials needed:
- Beads in 3 colors: 20 of the main color, 8 of the second color, and 12 of the third
- Needle (the thinner the better!)
- Beading floss (available at any craft store)

Step 1: Thread your floss on your needle. I like to double up the floss. Make it nice and long.
Step 2: String 4 beads of your main color on the needle. Pull down the string until they are a few inches from the end. Then, put your needle through the 4 agains again, in the same order (i.e. the first bead you put on the needle is the first bead you put your needle through again). Don't worry if the shape isn't perfect. As you add more beads, the shape will become more defined.


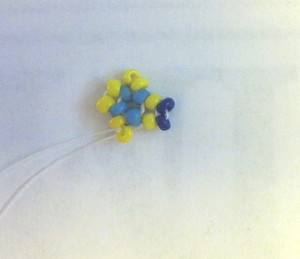
Step 3: String 2 beads of your second color on the needle. Go through the next main color bead to anchor. See pictures and diagram below. Repeat 3 more times for a total of 8 new beads. If you are following the diagram, string beads 1 and 2, then go through bead A. Then string 3 and 4, and go through B. String 5 and 6, go through C. String 7 and 8, then go through D. To get ready for the next row, go through bead 1 (second color) again. Your first 4 beads should now have a good shape. Your second color will look better after we add the next row.


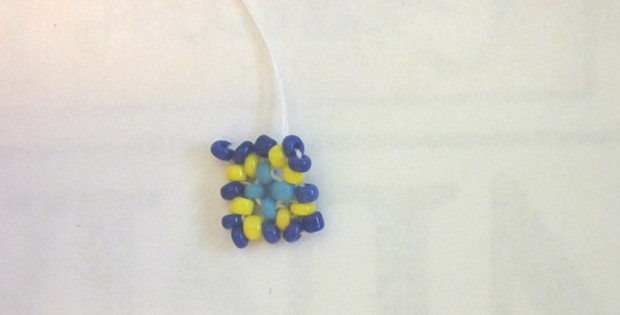
Step 4: String 2 beads of your third color. Go through the next corner bead. String 1 bead of your third color. Go through the next corner bead. Repeat three time: You will add 8 beads in the corners, and 4 beads in between (see diagram below). Just like last time, prepare for the next round by pulling your needle through the first bead of color 3 (bead #1 in diagram).


Step 5: This is the last row! We will be continuing the pattern: Adding 2 beads of you main color at each corner, and 1 bead to fill the other spaces in the row. This time, you will add 16 beads total: 8 corner beads, and 8 side beads.


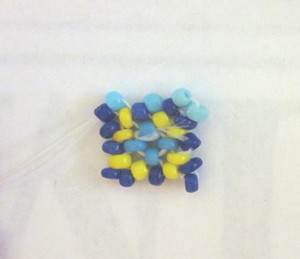


Step 6: Run your needle through all the beads on your outside row again. While this makes the thread more noticeable, it also helps the granny square to keep its shape.

|
| Above, the middle bead does not have the thread reinforcing the outside row. The squares to either side of the middle do. Can you see the difference? |
Congratulations! You've made your first beaded granny square. I just created these today, so if you have any suggestions or improvements, please comment and let me know!
No comments:
Post a Comment